
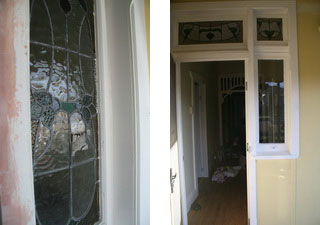
This is a complete step by step guide to show you how we restore your leadlight panel.Our qualified glazier / leadlighter arrives onsite. He will assess the leadlight and give you a full run down of what he is going to do on the day.
Step 1
The leadlight will be carefully removed from its frame and a replacement sheet of glass or timber board will be put back in its place to give you a safe and secure premises, not to mention piece of mind.
Step 2
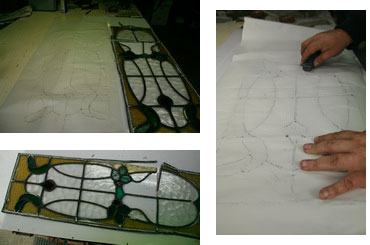
The leadlight is taken back to our studio to begin its transformation. We start by taking a paper template of the leadlight design to give a guided map of each piece of glass in that leadlight.
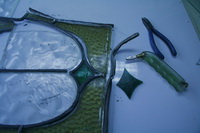
We then carefully remove the lead that surrounds each piece of glass in the leadlight, piece by piece.
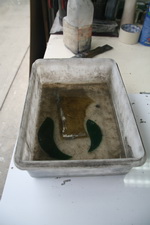
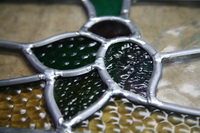
We place each piece of glass in a bath of mild acid to remove any build up of dirt / paint etc.
Once the leadlight pieces are all cleaned they are put into position to make the overall leadlight design.

We also cut new pieces of glass to replace broken or damaged pieces of glass from the original leadlight.
Glass will be matched or as close as possible to the original and usually ends up with a great result. There are times where glass cannot be matched and we will advise you before removing your leadlight and also show you close alternatives.

Step 3
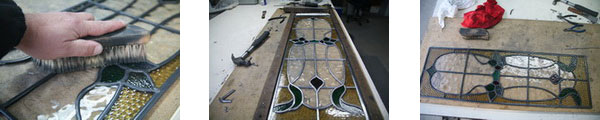
Now we start with the leadlights boarder lead which surrounds the entire panel, and from the corner we start putting the leadlight back in to its original format.
Slowly moulding each piece of lead into the shape of each piece of glass and locking in each piece in with horse shoe nails until the leadlight is back to its original design and also its size.
Now the leadlight is fully reconstructed, we square up the corners and lock the leadlight into position so it cannot move when we solder the panel back together.

Step 4
 We prepare the joins to be soldered by using a flux which binds the solder to the lead to secure a solid join. Once we heat the join using a Soldering Iron, we melt the solder onto the join and it bonds and welds together.
This procedure is done to every join on the leadlight. The leadlight is then removed from its position and turned onto the opposite side to start the procedure again.
Step 5
Now the leadlight has been fully soldered we now push putty in between the lead and the glass of each piece. This makes the panel more ridged and it also stops the glass rattling and makes it weatherproofed to stop wind and rain. Once this is done we remove any excess putty and then it is left to dry. Once dry, we hand polish the panel to buff the lead a shiny black colour.
In some cases we need to match other existing panels onsite, so we leave the lead in its original colour, and in a short time it looks fairly weathered so it does not stand out from the adjoining panels.
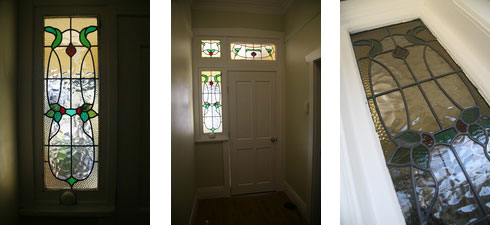
Now your leadlight panels are ready to be installed.
Once a day has been arranged with you, we will come back out and remove the temp glaze and install the leadlight back in its original position and bring it back to its former glory.
If you have any further questions, please do not hesitate to contact me or our friendly staff on 9756 6080 or myself on 0411 866 125. I hope this gives you a better understanding of what we do.